What Is a Wood Screw and How Do You Choose the Right One?
A Wood Screw looks simple, but its design controls how safely and cleanly two materials join. Thread shape, shank length, head style, and coating all affect performance. Choosing by appearance alone can lead to splitting, weak joints, or damaged surfaces.
In a workshop, the right choice starts with the materials. Soft pine may need a different thread than dense oak. A cabinet screw should not automatically replace a structural fastener. Check the manufacturer’s specifications, especially for load-bearing projects. Also consider moisture, exposure, and the tool used for installation. A corrosion-resistant finish matters near kitchens, bathrooms, and outdoor furniture.
Small details make a visible difference. A pilot hole can reduce splitting near a board’s edge. The screw should pass through the first piece without leaving excessive threads above the surface. Too short, and the joint may pull apart. Too long, and the tip may break through the opposite face.
Test one screw first.
That step is easy to skip. It is also where many mistakes begin. This guide explains what a Wood Screw is, how its parts work, and how to match it with wood type, joint design, and working conditions. It will also examine common choices, including construction screws, trim screws, pocket-hole screws, and exterior-rated options. Recommendations should remain practical, not absolute. Wood density varies, tools behave differently, and real projects rarely match textbook examples perfectly. A careful test piece and reliable product information still deserve the final decision.
Define Wood Screws: Threads, Shanks, Heads, and ASME B18.6.1
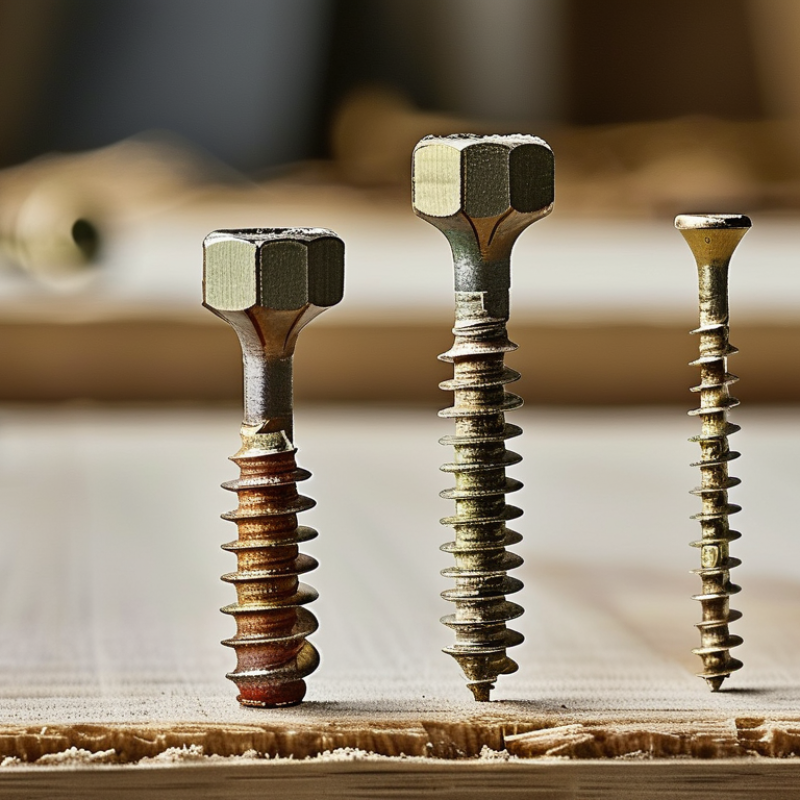
A wood screw is a fastener designed to grip timber through its tapered body and sharp threads. Its threads cut into wood fibers, creating holding power without needing a separate nut. Coarse threads usually suit softwood, while finer threads can provide better control in hardwood. The unthreaded shank sits near the head and can pull two boards tightly together. It also reduces resistance when the upper board slides over the screw.
The head transfers driving force and determines the finished surface. A flat head can sit flush after countersinking, while a round or oval head remains visible. Choose the length carefully. The screw should pass through the first board and penetrate the second deeply, but not emerge.
ASME B18.6.1 defines dimensional and performance requirements for inch-series wood screws, including body, thread, head, and point features. It offers a dependable reference when checking specifications, not a substitute for judging the actual timber.
I once selected a screw by length alone. That was careless. The head split the edge, and the joint loosened after seasonal movement. Now I check the wood species, board thickness, pilot-hole size, and exposure conditions. A corrosion-resistant finish may be necessary outdoors. Test one screw first. Small details matter.
Match Screw Size to Wood Using NDS 2024 Withdrawal Design Values
A wood screw is a threaded fastener that grips wood through its threads. Choosing one requires more than checking its head shape or length. The screw must resist withdrawal, shear, and sometimes repeated movement. For structural work, the NDS 2024 withdrawal design values provide a more reliable starting point than guesswork.
Use the applicable table for the wood species, specific gravity, screw diameter, and threaded penetration. Values are usually given per inch of penetration, so a longer effective thread engagement can increase withdrawal resistance. However, the entire screw length does not count. The unthreaded section, damaged fibers, and shallow edge distance may contribute little. Soft wood may need a longer screw, while dense wood may require a pilot hole to prevent splitting.
Check the adjusted design value, not only the reference value. Moisture, load duration, temperature, and installation conditions can change capacity. A screw driven near an end grain often performs worse than the table suggests. I have seen “long enough” screws fail because only a short threaded section entered sound wood. That detail is easy to miss. Choose a diameter that fits the load, then confirm penetration, spacing, and edge distances against the NDS 2024 provisions. When the species is uncertain, use conservative assumptions and document them. Guessing is not a design method.
What Is a Wood Screw and How Do You Choose the Right One?
Match Screw Size to Wood Using NDS 2024 Withdrawal Design Values
| Wood Type |
Specific Gravity
(G) |
Typical Use |
Suggested Screw |
Nominal Diameter |
Minimum Effective
Thread Penetration |
Reference Withdrawal
Value per Inch |
Reference Value at
2 in Penetration |
Selection Guidance |
| Western red cedar |
0.36 |
Outdoor trim, siding, light-duty assemblies |
#8 |
0.164 in |
1 1/2 in |
100 lb/in |
200 lb |
Use corrosion-resistant fasteners and avoid overdriving in this relatively soft wood. |
| Spruce-pine-fir |
0.42 |
Framing, cabinets, general carpentry |
#8 |
0.164 in |
1 1/2 in |
126 lb/in |
252 lb |
A #8 screw is suitable for many light and medium-duty wood-to-wood connections. |
| Hem-fir |
0.43 |
Framing and structural blocking |
#10 |
0.190 in |
1 1/2 in |
146 lb/in |
292 lb |
Choose #10 when greater withdrawal resistance or a larger bearing surface is needed. |
| Douglas-fir-larch |
0.50 |
Framing, ledgers, structural wood connections |
#10 |
0.190 in |
2 in |
183 lb/in |
366 lb |
Use a longer screw when the attached material is thick or the connection carries higher tension. |
| Southern pine |
0.55 |
Decking, framing, treated lumber |
#10 |
0.190 in |
2 in |
212 lb/in |
424 lb |
For treated lumber or exterior work, verify that the screw coating is compatible with the treatment. |
| Southern pine |
0.55 |
High-load wood-to-wood connections |
#12 |
0.216 in |
2 in |
232 lb/in |
464 lb |
Move to #12 when the joint needs more withdrawal capacity and the receiving member can accept the larger diameter. |
| Red oak |
0.63 |
Furniture, hardwood joinery, interior assemblies |
#8 |
0.164 in |
1 1/4 in |
232 lb/in |
464 lb |
Predrill near edges and in dense hardwood to reduce splitting and installation torque. |
| Red oak |
0.63 |
Hardwood structural or heavy-duty joinery |
#10 |
0.190 in |
1 1/2 in |
259 lb/in |
518 lb |
Use #10 only when the joint layout provides sufficient edge distance and end distance. |
| Mixed or unknown softwood |
0.40 |
General repair and noncritical assemblies |
#8 |
0.164 in |
1 1/2 in |
117 lb/in |
234 lb |
Use the lower specific gravity when the species or grade is uncertain. |
Calculation basis: Reference withdrawal values are calculated using the NDS-style side-grain withdrawal equation W = 1,800G1.5D0.75, where W is pounds per inch of effective threaded penetration, G is specific gravity, and D is nominal screw diameter in inches.
Important: The 2-inch values assume 2 inches of effective threaded penetration and are rounded to the nearest pound. They are reference values, not a complete connection design. Final allowable values may require applicable NDS adjustment factors for wet service, temperature, load duration, toe-nailing, end grain, spacing, edge distance, member thickness, and installation conditions.
Length selection rule: Screw length should generally equal the thickness of the attached material plus the required effective thread penetration, while avoiding breakthrough and maintaining adequate edge and end distances.
Choose Steel, Stainless Steel, or Coatings for Corrosion Classes
A wood screw has a threaded shank that grips timber and a head designed for driving. Its performance depends on more than length and thread shape. Moisture, salt, chemicals, and temperature can change the correct choice. A dry indoor shelf usually needs less protection than a garden bench exposed to rain.
Plain carbon steel screws are economical and strong for low-corrosion environments. They suit dry rooms, furniture, and protected framing. However, their surface can rust quickly after a cut or scratch. Plated or coated steel improves resistance, but the coating may wear during installation. I once underestimated this risk on an outdoor project. The visible finish looked intact, yet rust appeared around the driven head months later.
Stainless steel is a safer option for damp areas, kitchens, bathrooms, and coastal air. Austenitic grades generally resist corrosion better than ordinary coated steel, although they can be softer and more prone to galling. Drive slowly. Use the correct bit. For recognized corrosion classes, such as low indoor exposure through severe marine conditions, match the screw material to the site classification rather than appearance alone. Coatings can work well in moderate exposure, but they are not automatically suitable for salt spray or constant wetting. Check the manufacturer’s tested coating system, installation limits, and the applicable corrosion standard. The hardest part is often the environment assessment. A sheltered wall may still collect condensation behind the board.
What Is a Wood Screw and How Do You Choose the Right One?
The chart shows the upper boundary of first-year steel thickness loss for each atmospheric corrosivity class, based on ISO 12944-2. Higher classes indicate more aggressive exposure and generally require stronger corrosion protection.
For dry indoor applications, zinc-coated carbon steel is often suitable. In damp, outdoor, coastal, or chemically exposed environments, choose a corrosion-resistant coating or stainless steel that matches the exposure. The values describe atmospheric corrosivity, not guaranteed screw service life.
Select Length and Diameter with a Minimum 2/3-Inch Wood Embedment
What Is a Wood Screw and How Do You Choose the Right One?
A wood screw joins boards by cutting threads into timber. Its length and diameter affect strength, stability, and the risk of splitting.
A dependable starting point is simple: allow at least 2/3 inch of thread to embed into the second piece of wood. This measurement excludes the thickness of the board being attached.
For example, fastening a 3/4-inch board requires a screw longer than 1 7/3 inches, so a 1 1/2-inch screw may be a practical choice. Check the fit carefully. The screw should not break through the rear surface. Longer does not always mean stronger. It can damage hidden wiring, weaken thin stock, or create an ugly exit hole.
Diameter should match the material and expected load. Smaller screws suit light trim and narrow boards. Larger diameters provide better holding power for shelves, frames, and heavier joints. However, excessive diameter can split dry wood, especially near an edge.
I usually drill a pilot hole slightly smaller than the screw’s solid core. That step feels slow, but it reduces cracks and improves alignment.
Wood type also matters. Softwood accepts threads differently from dense hardwood. Test one screw in an offcut when the material is unfamiliar. For a loaded joint, keep the screw centered and maintain enough wood around it. The 2/3-inch rule is useful, but it is not a substitute for checking grain direction, joint movement, and the actual load.
Verify Installation with ASTM F1575 Testing, Spacing, and Torque Rules
A wood screw is not chosen by length alone. Diameter, thread form, head style, and corrosion resistance must match the joint. In a damp exterior assembly, material compatibility matters as much as holding power. Small details decide performance.
ASTM F1575 deserves careful interpretation. It is primarily a test method for determining the bending yield moment of nails, not a direct screw-installation inspection. Using it as proof of proper screw torque would be technically misleading. For screws, verify installation against project drawings, tested assemblies, and published fastener requirements. Check spacing from edges, ends, and neighboring fasteners before driving. Crowded screws can split the wood. Spacing should reflect wood species, member thickness, load direction, and the governing design specification. Do not copy a nail schedule blindly.
Torque needs the same discipline. There is no universal torque value for every wood screw. Overdriving can crush fibers, strip threads, or bury the head. Underdriving can leave gaps and reduce clamping. Use a calibrated driver when a torque range is specified, then record the setting and observations. A field check should include head seating, washer contact, joint closure, and visible splitting. I would also recheck a sample after conditioning or vibration. That step is easy to skip. Yet timber moves, and one inspection may not tell the whole story.